We are almost a year in to the whole working from home situation that 2020 threw upon us urgently and what a learning curve it has been for Pilates/Yoga teachers and those teaching from home! I previously wrote about My business during the pandemic here, and for a little insight to my business pre-covid check this post out! Even at this late stage I have been constantly updating my equipment and techniques to improve what I offer as I learn more about it, and I have received regular messages asking about various things. Today I wanted to share the set up I use for home teaching and my top tips in the hope it may help some other teachers improve their services too. (This post may contain some affiliate links but are all items I purchased at full price myself. Thank you for your support).
-
Have good sound quality
This to me is the most important aspect of home teaching. Participants at home want seamless sound without echo or interference, both of which can distract from the workout and provide unnecessary discomfort. I purchased the Wireless Rode Go after recommendation from another teacher, and it has seriously changed the game! The quality is 100% and the mic is so simple to use. Setting it up initially was troublesome as I had to ensure I could hear my clients as well as them hear me, so this required an additional mini cable so that we could bypass the headphone jack and use the thunderbolt port instead.
2. Have good lighting
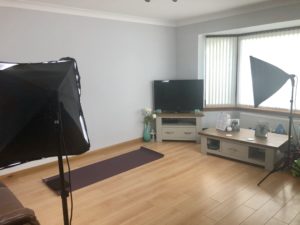
Lighting wasn’t much of an issue initially as the days were naturally light enough, however even on a dull day the “home studio” lighting could be reduced and this affects the overall atmosphere for participants on the other side of the screen. I use two large soft box lights like these ones here and it makes an incredible difference to the setting. Two is better than one to balance the lighting from both sides and avoid shadows. I also use a desk light beside my laptop to brighten the close up and screen for when I’m checking on clients.
-
Have an automated booking & reminder system, online register & PAR-Q forms
I started out doing bookings manually, but this is both time consuming and leaves room for error! Having an automated system (like BookWhen) that allows clients to choose their classes and sign up anytime makes your business much more accessible. My software also automatically sends them a reminder email and their Zoom link so it is a very straight-forward process. For this you need both a BookWhen and a Zoom subscription. The medical screening PAR-Q is in-built so that each client must complete this before starting classes and notifies me of the medical history, injuries, and experience. When we go live I record the register online using the software for insurance purposes and to ensure I know who attended and I can send the recording to those who missed it. This was probably the most professional advancement I made and I can relax knowing we adhere to insurance guidelines and are keeping every client safe and accountable as I can tailor modifications to their condition. Mailchimp also works well for my group emails and newsletters to update people.
-
Keep video cameras on if participants are comfortable with this
This is entirely up to the client if they feel comfortable with their camera on or not, however I do suggest they leave it on as it allows me to correct them just as I would in a face-to-face class (other than the physical correction!). If they put you on full screen they also are not looking at each other. You can adapt your class based on their responses, monitor fatigue or difficulty and provide a much more professional service overall. This also helps hugely in preventing injury and is key to a successful class, in my opinion. If there are no cameras on you are teaching to a blank screen and cannot care for your clients normally. This should also be written in your disclaimers and terms and conditions as all normal classes would expect you to be modifying based on the clients response.
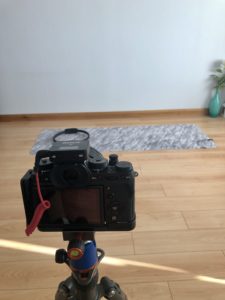
For video recording, I use a Fuji X-T2 on a tripod and then use Imovie for video editing and Photoshop and Lightroom for photo editing. This is the third camera I have moved to after 7 years of making Pilates videos. My previous two also did the job but I continued to upgrade on video image quality and feel I’ve found that here!
- Adapt your way of teaching
Teaching online is different to teaching in the room! You do not have the clients responding directly in front of you and speaking out like they would in a room. If you can see them on the screen however you can still adapt to their responses. Making your instructions very clear will reduce confusions and errors and ensuring you demonstrate a high quality exercise for a few repetitions, before adding extra teaching points, and then correcting them will make the switch to online smoother. I’ve found describing where they should feel the exercise and re-enforcing technique more than normal has really helped my clients experience the workout better too.
I hope these tips will help you enhance your online teaching system and improve your client’s experience! It’s not necessarily about getting it right first time, but very much a work in progress and if there is a better way to do it I aim to get there to ensure my clients have the best session! I’d love you to share any of your tips below!